
For sharp, repeatable helicopter photos, shoot at 1/1000s or faster, bring a mid-range zoom like a 24-70mm or 24-105mm, and brief your pilot before takeoff on flight path and lighting. Tether every piece of gear, skip lens changes in flight, and take test frames on climb-out to map where the skids or rotor blades creep into frame. Everything else is refinement.
TL;DR:
- Shooting at or above 1/1000s is essential to counteract helicopter vibrations; increasing shutter speed to 1/1600s or higher benefits telephoto shots on bumpy flights.
- Using a zoom lens between 24-70mm or 24-105mm provides versatile framing and minimizes lens changes during flight, with wider angles preferable for landscapes and cityscapes.
- Brief your pilot beforehand on shot angles, subject positioning, and lighting goals, as clear communication significantly improves the chances of capturing desired images.
- Tether all gear securely, avoid lens changes mid-flight, and carry two camera bodies to ensure no critical shot is missed due to gear issues or mishaps.
- Shooting in burst mode with back-button autofocus, and reviewing test frames during climb-out, helps identify obstructions early and improves overall image quality.
Table of Contents
- Camera Settings for Helicopter Photography: Shutter, Aperture, ISO
- Which Lenses Work Best for Helicopter Photography?
- How Should You Brief the Pilot Before a Helicopter Shoot?
- In-Flight Techniques: Bracing, Framing, and Test Shots
- Safety Rules Every Aerial Photographer Should Follow
- What Should You Do Right After the Flight?
- Helicopterstour’s Take on Choosing a Camera-Ready Tour
- Manual Focus or Autofocus: What Works Best Aboard a Helicopter?
- How Do You Avoid Reflections When Shooting Through a Helicopter Window?
- Do You Need a Gimbal or Stabilizer for Aerial Shots?
- Post-Processing Tips for Helicopter Photos
- Which Helicopters Work Best for Photography?
- How Does Weather Affect Helicopter Photography?
- The Playbook That Actually Matters on a Real Tour
- Sources
- FAQ
Camera Settings for Helicopter Photography: Shutter, Aperture, ISO
Vibration is the enemy, and shutter speed is your main defense. Set a baseline of 1/1000s and treat that as your floor, not your target. If you’re shooting a telephoto lens or the air is bumpy, push to 1/1600s or faster. A useful field heuristic: divide 1.5 into your focal length’s inverse, so a 200mm lens wants something closer to 1/1300s just to counteract the accumulated sway from rotor-induced vibration.
Aperture sits in the f/5.6 to f/8 range for most shots. That band gives enough depth of field to keep foreground and background reasonably sharp while staying in each lens’s optical sweet spot, well clear of the diffraction softness you get at f/16 or beyond.
ISO is where a lot of photographers overthink things. Auto-ISO with a ceiling is the smarter move than manually chasing exposure while the horizon tilts and the light shifts every few seconds.
- Set shutter speed and aperture manually, then let Auto-ISO fill the gap.
- Cap Auto-ISO around 1600 on full-frame bodies, or 3200 if your sensor handles noise well.
- Shoot continuous/burst mode. One good frame out of six beats one gamble.
- Use back-button autofocus so a half-press doesn’t accidentally reset focus between bursts.
- Dial in exposure compensation ahead of major light changes, like turning from shadowed terrain toward open water.
Pro Tip: Meter for the brightest element in your frame, usually the sky or reflective water, and let shadows sit a stop underexposed. You can recover shadow detail in RAW; you can’t rebuild a blown-out sky.
According to PetaPixel’s field guide to helicopter photography, that 1/1000s to 1/1600s range paired with f/5.6 to f/8 and Auto-ISO is close to universal advice among working aerial shooters, and for good reason: it’s the combination that survives unpredictable light without forcing constant manual adjustment.
Which Lenses Work Best for Helicopter Photography?
A 24-70mm or 24-105mm zoom is the single most useful lens you’ll pack. It covers wide establishing shots and moderate reach without forcing you to touch your lens mount once you’re airborne, which matters more in a helicopter than almost anywhere else you shoot.
Bring a 16-35mm when you know you’re chasing sweeping landscapes, coastlines, or city skylines where the mid-range zoom’s tightest wide setting still feels cropped. Telephoto lenses have a place too, particularly for wildlife or tight architectural details, but they amplify vibration. If you’re shooting past 100mm, expect to raise your shutter speed proportionally and shoot in shorter bursts rather than long, sustained rolls.
The fix for lens indecision isn’t a bag full of options. It’s two camera bodies, one with your zoom, one with your wide or telephoto, both ready to shoot the second the door opens.
- Keep both bodies on separate straps, tethered to a secure anchor point.
- Pre-format memory cards the night before and label spares clearly.
- Keep backup batteries in an inside jacket pocket, not a bag pocket, so cold air doesn’t drain them early.
- Carry at least one spare card per body, formatted and ready, not buried in a backpack you can’t reach mid-flight.
Pro Tip: Label your card cases by flight leg or date before you board. Sorting through unlabeled cards after three flights in one trip is how usable images go missing.
How Should You Brief the Pilot Before a Helicopter Shoot?
Your pilot is your most valuable creative collaborator on the flight, not just the person flying the aircraft. A few minutes of clear communication before takeoff changes what you’re able to capture.
- State your subject and shot list plainly: what you need, from which angle, and roughly how long you’ll need at each position.
- Request a specific orbit direction and altitude range so the subject stays framed on your side of the aircraft.
- Confirm headset use for in-flight communication, since shouting over rotor noise doesn’t work and headsets let you redirect the pilot without breaking concentration.
- Ask about doors-off policy and emergency procedures, and get a clear answer before you’re airborne, not mid-flight.
- Decide your seating position based on which side gives you the better angle on your subject, then confirm that with the crew.
- Time your request around golden hour or a specific shadow pattern if lighting is central to the shot, since pilots can often adjust departure time by twenty or thirty minutes to meet it.
Skipping this conversation is the most common reason photographers come home with a card full of tail rotor and skid instead of the shot they wanted.
In-Flight Techniques: Bracing, Framing, and Test Shots
Your body is the best stabilizer you have. Float your arms away from your torso and keep your elbows loose rather than locked against your ribs or the airframe. This lets your arms absorb vibration before it reaches the lens, since any contact with the helicopter’s structure transmits engine and rotor sway directly into your shot.
The moment you’re airborne, shoot a few test frames at your widest focal length during climb-out. This isn’t wasted film. It shows you exactly where the skid, door frame, or rotor blade tip creeps into the corner of your composition, so you can adjust your position before the real shots matter. Wardynski Photo’s field notes recommend this specifically because obstruction thresholds shift with altitude and bank angle, and they’re nearly impossible to predict from the ground.
Composition-wise, aerial work rewards a few consistent habits:
- Place the horizon deliberately, either dead level for a clean documentary look or angled for a dynamic diagonal, but never accidentally tilted.
- Use roads, rivers, or coastlines as leading lines that pull the eye through the frame.
- Include a scale reference, a boat, a building, a car, so viewers register altitude and distance instead of seeing an abstract pattern.
- Shoot in continuous burst mode through banking turns, then cull hard afterward.
- Shoot RAW and check your histogram between passes, not just your rear screen preview, which lies in bright daylight.
Pro Tip: Chimp less, shoot more. Reviewing your last frame on the LCD costs you the next three seconds of a pass you won’t get to repeat.
Safety Rules Every Aerial Photographer Should Follow
None of these are optional, and pilots will enforce most of them regardless of your preference.
- Tether every camera and lens to a secure anchor point in doors-off flights, using a short lanyard rather than a long strap, since rotor wash creates unpredictable pull that turns a loose strap into a swing hazard.
- Never change lenses mid-flight. Bring two preloaded bodies instead, and treat an open sensor in an open aircraft as a real risk to your gear and the flight itself.
- Store loose items, filters, lens caps, spare batteries, in zippered pockets or a secured flight bag, never loose on your lap.
- Loose objects near open doors risk being pulled into the rotor system, which is a safety issue for everyone on board, not just an inconvenience for you.
- Manage motion sickness before it starts: eat lightly beforehand, keep your eyes on the horizon between shots, and always follow crew instructions the instant they’re given.
What Should You Do Right After the Flight?
The work isn’t done when you land. What you do in the next hour determines whether the flight was worth it.
- Back up your cards immediately to a laptop or portable drive before you do anything else, even before lunch.
- Flag or star-rate your obvious keepers while the flight is still fresh, and jot quick notes on subject location and approximate timestamp.
- Debrief with your pilot or crew while details are sharp. Confirm which landmarks you actually captured and ask what you missed for next time.
- Resist editing immediately. Adrenaline and fatigue make for sloppy color and crop decisions, so schedule your real editing session once you’ve had food, rest, and a clear head.
Helicopterstour’s Take on Choosing a Camera-Ready Tour
Some online platforms verify FAA-certified operators and analyze traveler reviews across multiple tours, which matters because not every operator accommodates photography requests the same way. Some allow doors-off flights and flexible seating; others run fixed routes with no room to negotiate angle or timing.
If light and composition matter to your trip, check tour listings on Helicopterstour for operator details before booking, and ask directly about doors-off policy, seating flexibility, and whether departure times can shift toward golden hour. A quick preflight checklist conversation with the operator saves you from discovering these limits mid-flight.
Manual Focus or Autofocus: What Works Best Aboard a Helicopter?
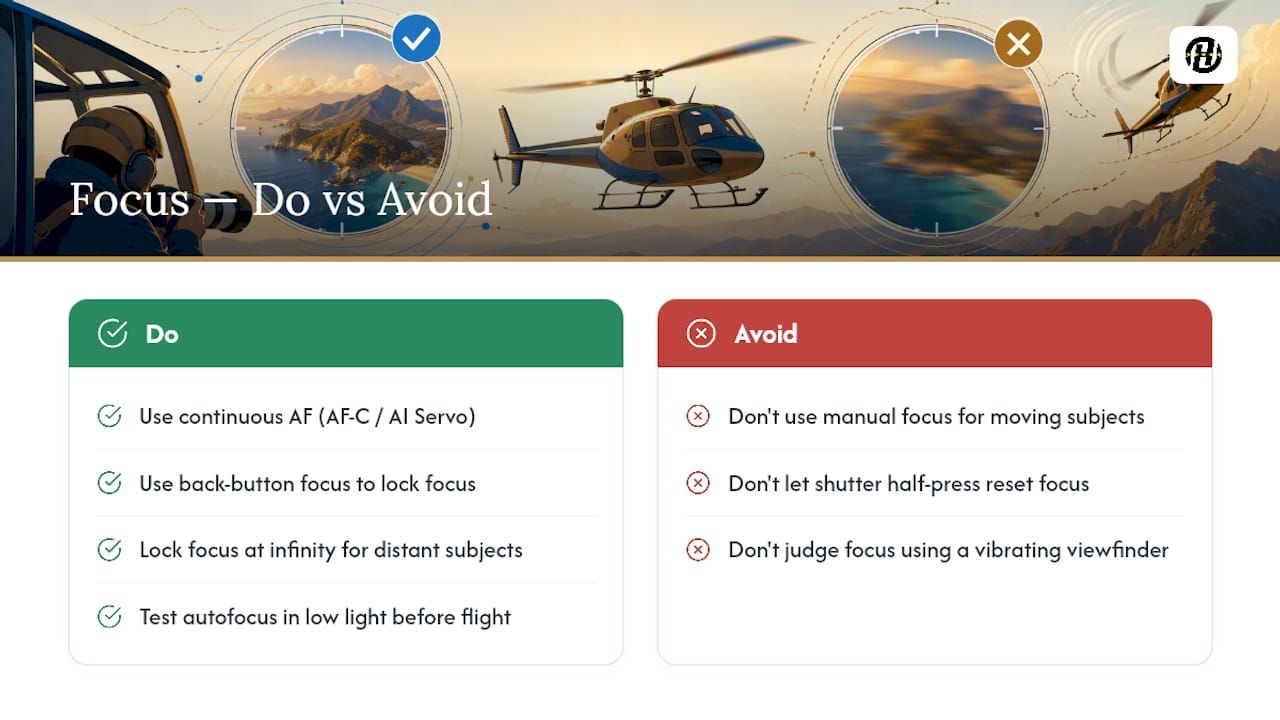
Autofocus is the right default for nearly all helicopter work, and continuous autofocus (AF-C or AI Servo, depending on your system) paired with back-button focus gives you the fastest recovery when your subject shifts position between banks. Vibration and constant subject-distance changes make manual focus a liability for most shots, since you can’t reliably judge focus through a viewfinder that’s shaking at 500 feet.
Manual focus earns its place in a narrower set of situations. If you’re shooting a fixed, distant landmark like a mountain range or skyline where focus distance won’t change shot to shot, locking focus manually at infinity removes the risk of your autofocus hunting against a featureless sky or reflective water, both of which confuse contrast-detection systems.
Back-button autofocus deserves particular attention here. Separating focus activation from your shutter button means a half-press on your shutter never resets focus mid-burst, which matters enormously when you’re firing continuous frames through a turn. Set your focus mode once, engage it with your thumb, and leave your shutter finger free to fire without disturbing your active focus point.
One habit worth building before you ever board: test your autofocus behavior in low light on the ground beforehand, particularly if you’ll be shooting during golden hour when contrast drops and autofocus systems slow down. Knowing your camera’s specific hunting tendencies at dusk means you’re not troubleshooting it for the first time mid-flight, thousands of feet over your subject.
How Do You Avoid Reflections When Shooting Through a Helicopter Window?
The simplest fix is the one most photographers overlook: shoot doors-off whenever the operator allows it. No glass means no reflection, no distortion, and no color cast from tinted windows, and it’s the single biggest quality jump available to you on any tour.
When doors-off isn’t an option, a few habits limit the damage. Press your lens hood, or your hand cupped around the lens barrel, directly against the glass to block ambient light from your side of the aircraft. This kills most of the interior reflections that would otherwise show up as ghost images of the cabin, your own gear, or your face.
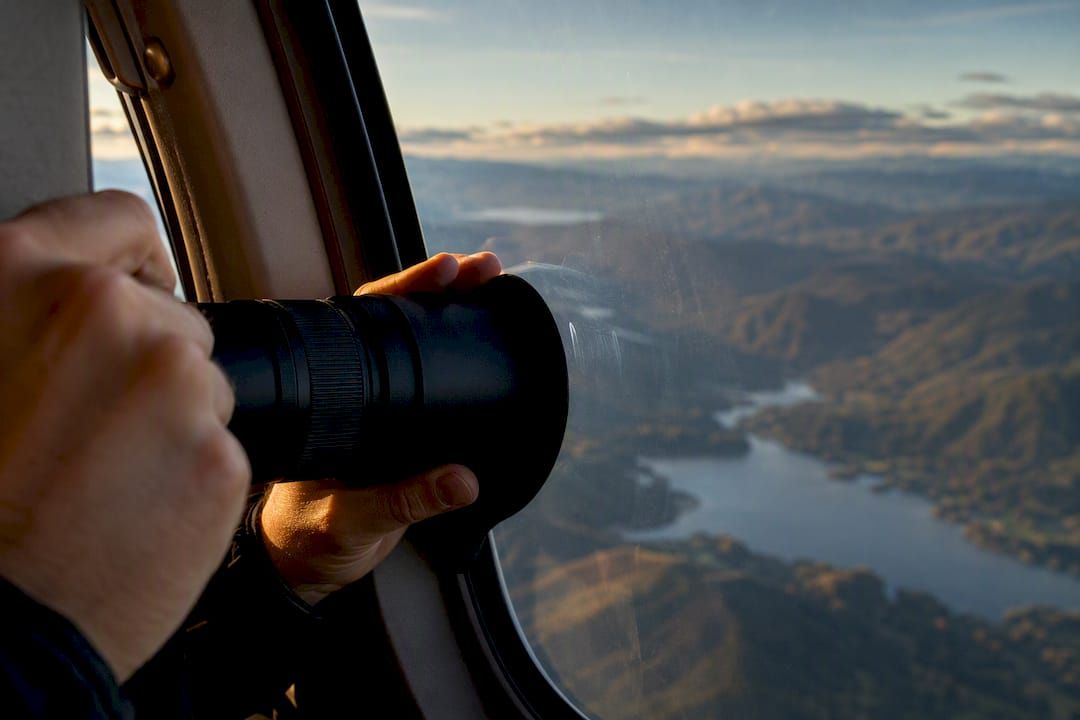
Shoot at an angle rather than dead perpendicular to the glass when you can. Perpendicular shooting through curved acrylic windows, common on many tour aircraft, introduces more optical distortion and catches more reflected light than a slight angle does.
Avoid using a polarizing filter as your default fix. Circular polarizers can help cut glare in some conditions, but the tinted plastic used in most helicopter windows already has its own optical properties, and stacking a polarizer on top sometimes introduces color shifts or uneven darkening across the frame rather than solving the problem cleanly. Test it on the ground with your specific aircraft’s window type before relying on it in the air.
If reflections still show up in a frame you love, note it during your immediate post-flight review rather than during editing days later, since you’ll remember exactly which pass and window caused it and can plan around that seat position next time.
Do You Need a Gimbal or Stabilizer for Aerial Shots?
For most photographers on a standard tour, no. Handheld shooting with proper bracing, floated arms, elbows loose, high shutter speed, covers the vast majority of helicopter photography needs without added weight or setup time you don’t have in a moving aircraft.
Gimbals earn their place in specific scenarios: video work, extended telephoto sequences where even a fast shutter can’t fully arrest motion, or professional shoots using medium-format bodies too heavy to brace comfortably by hand for an entire flight. Helicopters can carry heavier gear over longer flight times than drones, which is exactly why professional aerial cinematographers sometimes mount gyro-stabilized rigs for sustained landscape sequences that would be impossible to hold steady by hand for twenty minutes straight.
If you’re bringing a stabilizer, confirm with the operator ahead of time that mounting hardware is compatible with the aircraft and permitted under their safety protocols. Many operators restrict external mounts entirely, and even interior gimbal rigs need enough cabin space to swing freely without striking the door frame, another passenger, or the pilot’s controls during a bank.
For nearly everyone shooting a scenic or tour flight rather than a dedicated commercial production, the better investment is practicing your bracing technique and shutter discipline before the flight, not renting stabilization gear you’ll fight to operate in a cramped cabin.
Post-Processing Tips for Helicopter Photos
Horizon tilt is the most common fix you’ll make, and it’s often more pronounced in aerial work than any other genre because you’re shooting from a banking, moving platform rather than solid ground. Most editing software includes a horizon or straighten tool tied to a grid overlay; use it on every frame where the horizon is visible, even shots that look close to level at first glance.
Color grading benefits from restraint rather than heavy stylization. Aerial light, especially during golden hour, already carries strong warm tones and long shadows, so a light touch on white balance and a modest contrast boost usually outperforms an aggressive preset built for ground-level portraits or landscapes.
Haze and atmospheric distance are specific to altitude work. Frames shot from higher altitudes often show a soft blue or gray cast over distant terrain caused by atmospheric scattering. A dehaze or clarity adjustment targeted specifically at the background, rather than applied globally, keeps foreground detail from turning harsh while cutting through that haze layer.
Crop carefully rather than aggressively. Many aerial frames include a sliver of skid, rotor shadow, or door frame at the edge, and a modest crop solves it cleanly without sacrificing the sense of scale that makes an aerial shot read as an aerial shot in the first place. Cropping too tight can flatten the perspective and make the image look like it could have been shot from a rooftop instead of a few thousand feet up.
Which Helicopters Work Best for Photography?
Not every aircraft in a tour fleet is built the same way, and the differences matter more than most first-time flyers expect. Bubble-window helicopters, like the popular observation models used on many scenic tours, offer expansive, low-set glass that curves down toward the floor, giving you a wider vertical field of view than a standard cabin window without needing doors-off access.
Doors-off configurations, where available, beat any windowed aircraft for image quality regardless of the airframe, since they eliminate glass entirely. Operators offering this option typically restrict it to specific aircraft models certified for the configuration, so it’s worth asking directly rather than assuming every helicopter in a fleet can fly that way.
Larger cabin aircraft carrying multiple passengers give you more room to shift position and brace properly, useful if you’re bringing two bodies or want to move between window positions during a longer flight. Smaller two- or four-seat aircraft offer tighter, faster orbits around a single subject, which can be an advantage for tight compositional work on a specific landmark but limits your ability to reposition mid-flight.
Sustained flight time and heavier payload capacity are the two structural advantages helicopters hold over smaller aircraft or drones for serious aerial work, letting you carry a full two-body kit and stay airborne long enough to wait out a cloud bank or chase a specific light angle across an extended pass.
How Does Weather Affect Helicopter Photography?
Wind and turbulence change your shooting plan more than almost any other variable. Light, consistent wind is often manageable and barely registers in your images if you’re bracing correctly, but gusty or shifting wind creates unpredictable jolts that no shutter speed fully compensates for.
Ask your pilot directly about current conditions before boarding, and trust their read on whether a flight is worth doing for photography purposes that day. A pilot who suggests postponing or rerouting around a system usually has a specific reason, not just caution for its own sake.
Overcast skies flatten light and reduce the contrast that makes aerial images pop, but they also reduce harsh shadows and can work well for architectural or urban subjects where even lighting matters more than dramatic contrast. Clear days near golden hour remain the gold standard for landscape and coastline work specifically because directional light at low sun angles creates depth and texture that midday sun simply can’t produce. Check the best time of day for your specific tour when booking, since some routes favor morning light while others are built around sunset departures.
In genuinely turbulent conditions, raise your shutter speed further than usual, favor your mid-range zoom over telephoto reach, and accept a higher shot-to-keeper ratio. Some flights are simply better suited to fewer, more deliberate frames than a high-volume burst approach.
The Playbook That Actually Matters on a Real Tour
Most advice on this topic treats camera settings as the whole story, and that’s the gap worth calling out. Shutter speed and aperture are the easy fifteen minutes you handle before boarding. The harder, more consequential work happens in the two minutes before doors close, when you either brief your pilot clearly or you don’t, and when you either tether your gear properly or you improvise with a shoulder strap.
I’d argue the conventional emphasis on gear is backwards. A photographer with a single 24-70mm, a clear pilot briefing, and disciplined bracing will consistently outshoot someone carrying three lenses and no communication plan. The settings in this guide work because they’re simple enough to set once and trust, freeing your attention for the conversation with your pilot and the read on your subject.
Prioritize the briefing first, gear second, settings third. That order feels backwards to most photographers walking in, but it’s the order that actually produces usable frames when the door opens and you have ninety seconds to get the shot.
— Justin
Sources
- 10 tips to get the best results photographing out of helicopters — PetaPixel
- How to take photographs from a helicopter — Fstoppers
- 7 tips on shooting from a helicopter — Digital Photography School
- How to photograph from a helicopter — Wardynski Photo
FAQ
What is the 20-60-20 rule in photography?
The rule refers to dividing a frame roughly into thirds for balanced composition, similar in spirit to the rule of thirds, though definitions vary by photographer and it isn’t a fixed technical standard in aerial work specifically.
How do you take a good photo from a helicopter?
Use a sufficiently fast shutter speed, a versatile mid-range zoom, brief your pilot on flight path and lighting beforehand, tether your gear, and brace your body by floating your arms rather than resting them against the airframe.
What is the 2/3 rule for pictures?
This isn’t a standardized photography principle with one fixed definition; it’s sometimes used loosely to describe placing a horizon or subject at roughly two thirds of the frame, similar to rule-of-thirds composition guidance rather than a specific aerial technique.
What are some tips for photographing aircraft or shooting from one?
Prioritize a fast shutter speed above 1/1000s, avoid mid-flight lens changes by using two camera bodies, take test frames on climb-out to spot rotor or skid intrusion, and always confirm safety procedures and headset use with your pilot before takeoff.
Do I need a telephoto lens for helicopter tours?
Not usually. A 24-70mm or 24-105mm zoom covers most tour photography needs, and telephoto lenses add vibration challenges that require faster shutter speeds and shorter bursts to manage effectively.
Recommended
- What to Wear on a Helicopter Tour: Clothing, Camera, Comfort Tips
- Helicopter Tour Safety: Are Helicopter Tours safe?
- Best Helicopter Tours for First-Time Flyers: What to Expect and How to Prepare
- What to Expect on a Helicopter Tour: Before, During, and After